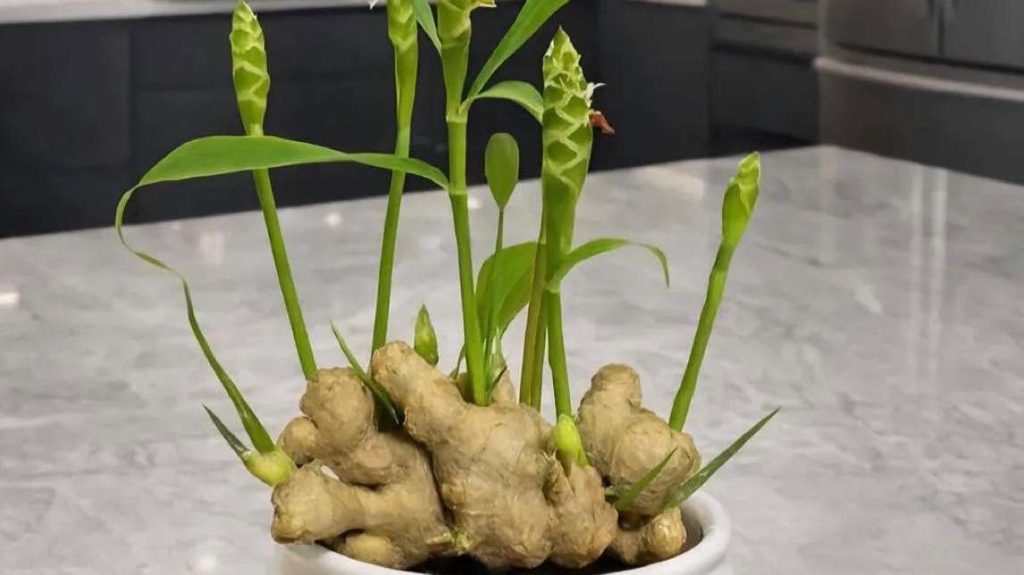
If you live in a warm climate, growing turmeric can be relatively easy. Even gardeners in cooler regions can grow it successfully in containers and move the plants indoors when temperatures drop. The key is to provide warm temperatures, moist but well-drained soil, plenty of indirect sunlight, and enough time for the rhizomes to mature.
This guide explains how to grow turmeric at home, from selecting planting material to harvesting fresh turmeric rhizomes.
1. Choose Fresh Turmeric Rhizomes
The easiest way to grow turmeric is from a fresh turmeric rhizome. Look for firm, healthy pieces with several small buds or “eyes” on the surface. Avoid rhizomes that are soft, moldy, dried out, or damaged.
You can purchase fresh turmeric from a grocery store, farmers’ market, or garden supplier. Organic rhizomes are sometimes preferred because they may be more likely to sprout, although not every store-bought turmeric will grow successfully.
Choose larger rhizomes with multiple healthy buds. These can produce several shoots and give you a stronger plant.
For a more detailed guide to the process, see our complete resource on growing turmeric.
2. Prepare the Turmeric Rhizomes
Before planting, cut a large turmeric rhizome into smaller sections if necessary. Each piece should ideally have at least one or two visible buds.
Allow freshly cut pieces to sit in a dry, shaded place for a day or two. This can help the cut surfaces dry slightly before planting.
If your turmeric rhizomes are already small, you can plant them whole. Handle the pieces gently to avoid damaging the growing buds.
3. Choose the Right Soil
Turmeric grows best in loose, fertile, well-draining soil. The soil should hold enough moisture to support healthy growth but should never remain waterlogged.
A good growing mix can include:
- High-quality potting soil
- Compost or well-rotted organic matter
- A small amount of coarse material to improve drainage
The soil should be rich in organic matter because turmeric is a heavy feeder during its growing season.
If planting directly in the garden, loosen the soil to a depth of at least 12 inches. Remove large stones and break up compacted areas before planting.
4. Pick a Warm Location
Turmeric is a tropical plant that prefers warm growing conditions. Choose a location that receives bright light but is protected from harsh afternoon sunlight, especially in very hot climates.
Turmeric generally grows well with several hours of sunlight each day. In warmer regions, morning sunlight and afternoon shade can provide excellent conditions.
The ideal temperature is generally warm and consistent. Cold weather can slow growth, while frost can seriously damage or kill the plant.
If you live in a colder climate, growing turmeric in a container is often the easiest option. You can move the container indoors or into a protected area when temperatures begin to fall.
5. Plant Turmeric Rhizomes
Plant turmeric rhizomes in early spring when the soil has warmed and there is no longer a risk of frost.
Place each rhizome horizontally in the soil with the buds facing upward. Cover it with approximately 1 to 2 inches of soil.
If planting multiple pieces, leave enough space between them for the plants to develop. Turmeric can eventually produce large leaves, so avoid overcrowding.
After planting, water the soil gently. Keep the soil consistently moist but not saturated.
6. Water Turmeric Regularly
Watering is one of the most important parts of turmeric care. The plant needs consistent moisture during active growth.
Check the soil regularly and water when the surface begins to dry. During hot weather, container-grown turmeric may require more frequent watering because pots dry out faster.
Avoid allowing the soil to remain soggy for long periods. Excess water can cause the rhizomes to rot and may lead to fungal problems.
A container with drainage holes is essential. If you are growing turmeric in a garden bed, make sure the planting area drains well after heavy rain.
7. Fertilize During the Growing Season
Turmeric benefits from nutrient-rich soil and occasional feeding during active growth.
Adding compost before planting can provide a good foundation. During the growing season, you can apply a balanced organic fertilizer according to the product instructions.
Avoid excessive fertilizer, especially products with very high nitrogen levels. Too much nitrogen can encourage leafy growth without necessarily producing the best rhizome development.
A healthy turmeric plant should produce strong green leaves throughout the growing season.
8. Protect Turmeric From Pests
Turmeric is generally considered a relatively low-maintenance plant, but it can still be affected by common garden pests.
Watch for signs of:
- Aphids
- Spider mites
- Scale insects
- Caterpillars
- Fungal diseases caused by excessive moisture
Inspect the leaves regularly, especially the undersides. Early detection makes pest management much easier.
Good air circulation, proper watering, and healthy soil can help reduce many common plant problems. Avoid overwatering and remove damaged or diseased leaves when necessary.
9. Growing Turmeric in Containers
Growing turmeric in containers is an excellent choice for gardeners with limited space.
Choose a wide container that is at least 12 inches deep and has several drainage holes. A wider pot gives the rhizomes enough room to spread underground.
Place the container in a warm location with bright, filtered light. Water when the top layer of soil begins to dry, and fertilize occasionally during active growth.
Container-grown turmeric can also be moved indoors before the arrival of cold weather. If growing indoors, place the plant near a bright window while protecting it from extreme temperature changes.
10. When to Harvest Turmeric
Turmeric usually needs a long growing season before the rhizomes are ready to harvest. Depending on growing conditions and variety, it can take several months for the underground rhizomes to mature.
One of the clearest signs that turmeric is ready for harvesting is when the leaves begin to turn yellow and naturally die back.
At this stage, reduce watering and allow the plant to enter dormancy. Carefully dig around the base of the plant and lift the rhizomes from the soil.
Use your hands or a small garden fork to avoid damaging the rhizomes. Shake off excess soil and gently wash them with clean water.
If you only need a small amount of fresh turmeric, you can harvest individual sections while leaving part of the plant growing. However, a full harvest is usually done when the plant has completed its growing cycle.
11. How to Store Fresh Turmeric
After harvesting, fresh turmeric can be stored in several ways.
For short-term storage, keep clean, dry rhizomes in the refrigerator. They can remain fresh for several weeks when stored properly.
You can also freeze turmeric for longer storage. Another option is to dry the rhizomes and grind them into turmeric powder.
If you plan to grow turmeric again next season, save some healthy rhizomes for replanting. Choose firm pieces with healthy buds and store them in a cool, dry location until it is time to plant again.
Final Thoughts
Growing turmeric at home can be a rewarding project for both beginner and experienced gardeners. The plant does require patience because turmeric needs a long growing season to develop mature rhizomes, but the process is relatively simple when you provide the right growing conditions.