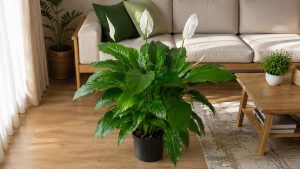
Planting a peace lily is a simple way to grow a beautiful tropical houseplant at home. With its glossy green leaves and elegant white flowers, the peace lily can add a fresh, natural touch to bedrooms, living rooms, offices, and other indoor spaces.
Although peace lilies are relatively easy to grow, planting them correctly gives the roots a better environment to establish and supports healthy new growth. The most important factors are choosing a suitable container, using well-draining soil, planting at the right depth, and providing the plant with appropriate light and moisture.
Choose a Healthy Peace Lily
Before planting, start with a healthy plant. Look for a peace lily with firm green leaves, healthy new growth, and no obvious signs of pests or severe damage.
Avoid plants with widespread yellowing, severely damaged foliage, or consistently waterlogged soil.
A smaller plant is often easier to establish after planting because it can gradually adapt to its new environment.
Choose the Right Container
The container should have drainage holes at the bottom. This allows excess water to escape and helps prevent the soil from staying saturated.
Choose a pot that is only slightly larger than the plant’s existing root ball. A container that is much too large can hold excess moisture for longer than necessary.
If you are moving a nursery plant into a decorative container, make sure the new pot provides enough room for the roots without leaving a large amount of unused soil around them.
Prepare the Right Soil
Peace lilies prefer soil that retains some moisture while still draining well.
A quality indoor potting mix is a good starting point. You can add perlite or other materials that improve drainage and aeration.
The final mixture should feel loose rather than dense and compact. Good drainage is especially important because peace lily roots can suffer when they remain in excessively wet soil.
Remove the Plant From Its Existing Pot
Water the peace lily lightly if the soil is extremely dry before removing it from its container.
Gently tilt the pot and support the base of the plant while easing the root ball out. Avoid pulling forcefully on the leaves or stems.
Once the plant is out, inspect the roots. Healthy roots generally look firm. If you notice damaged or unhealthy roots, carefully remove the affected portions with clean scissors.
Try not to disturb the root system more than necessary.
Place Soil in the New Container
Add a layer of fresh potting mix to the bottom of the new container.
Place the peace lily in the center and check its height before adding more soil. The top of the existing root ball should remain close to the surface rather than being buried deeply.
This is an important step because planting too deeply can keep the base of the plant excessively moist.
Plant the Peace Lily
Once the plant is positioned correctly, gently add potting mix around the root ball.
Press the soil lightly with your fingers to remove large air pockets, but do not compact it tightly. The roots need access to both moisture and air.
Leave a small amount of space between the soil surface and the rim of the container. This makes watering easier and reduces the chance of water spilling over the sides.
For gardeners interested in Peace Lily, proper planting is one of the first steps toward successful growing Peace Lily indoors.
Water After Planting
After planting, water the soil thoroughly until a small amount of water begins to drain from the bottom of the container.
This helps settle the potting mix around the roots.
Allow the excess water to drain completely. Do not leave the container sitting in a saucer full of water.
After the initial watering, check the soil regularly rather than watering automatically every day. Peace lilies prefer consistent moisture, but constantly saturated soil can create problems.
Find the Best Location
Place the newly planted peace lily somewhere with bright, indirect light.
A location near a window with filtered light can work well. Avoid exposing the plant to intense direct sunlight for long periods because strong rays can scorch the foliage.
Very dark locations may keep the plant alive but can result in slower growth and fewer flowers.
If the plant initially shows signs of stress after repotting, give it time to adjust rather than immediately making several major changes.
Maintain Warm Indoor Conditions
Peace lilies are tropical plants and generally prefer warm, stable indoor conditions.
Keep the plant away from cold drafts, heating vents, and air-conditioning outlets. Sudden temperature changes can stress the foliage.
Normal comfortable indoor temperatures are usually suitable. Consistency is more important than trying to create an unusually warm environment.
Maintain Proper Moisture
During the first few weeks after planting, pay attention to the soil.
Check the upper layer with your finger. When the surface begins to dry, water thoroughly and allow excess water to drain.
The exact watering frequency depends on factors such as temperature, humidity, pot size, soil type, and available light.
Instead of following a strict calendar, use the condition of the soil as your main guide.
Give the Plant Time to Establish
A newly planted peace lily may need some time to adjust to its new container.
It is normal for growth to slow temporarily after repotting. Avoid immediately adding large amounts of fertilizer or moving the plant repeatedly from one location to another.
Give it stable light, appropriate moisture, and comfortable temperatures.
Once the roots become established, you should gradually see new leaves emerging from the center of the plant.
Common Planting Mistakes to Avoid
One of the most common mistakes is choosing a container that is much too large. More soil means more moisture retention, which can make watering more difficult.
Another mistake is burying the plant too deeply. Keep the base of the plant at approximately the same depth as it was previously growing.
Using heavy soil can also restrict drainage. Choose a loose, well-draining mix instead.
Finally, avoid placing a freshly planted peace lily in harsh direct sunlight. Bright indirect light is generally a safer starting point.
When to Fertilize
There is usually no need to fertilize immediately after planting if you have used fresh potting soil that already contains nutrients.
Allow the plant to settle first. Once active growth resumes, you can use a balanced houseplant fertilizer according to the label directions.
Avoid applying more fertilizer than recommended. Excess nutrients can accumulate in the soil and cause problems over time.
How to Know Your Plant Is Establishing
Healthy new growth is one of the best signs that a peace lily is adapting successfully.
Look for new leaves emerging from the center, firm foliage, and steady growth.
If leaves begin turning yellow, the soil remains wet for a long time, or the plant repeatedly droops, review your watering routine and drainage first.
Remember that one symptom can have several possible causes, so look at the plant’s overall growing conditions before making changes.
Final Thoughts
Planting a peace lily successfully does not require complicated equipment or advanced gardening skills. Start with a healthy plant, choose a container with drainage holes, use a loose potting mix, and plant at the correct depth.
After planting, provide bright indirect light, appropriate moisture, and stable indoor temperatures. With a little patience, the plant can establish its roots and begin producing fresh foliage.
Once established, maintaining a simple routine of watering, feeding, pruning, and occasional repotting can help your peace lily remain healthy and attractive for years.